![The [RE]Search Co.](https://re-search.co/wp-content/uploads/2025/02/The-RE-Search-Co-Orange_Grey-png-350x51.avif)

Soundproofing a room, especially a meeting room or executive office, is essential to maintain confidentiality, minimise disturbances, and create a more focused environment.
Whether you’re in the process of designing a new space or trying to fix an existing acoustic issue, there are several strategies to reduce sound transmission effectively. The following will guide you through both preemptive and retroactive measures to achieve optimal soundproofing.
1. Understanding Sound Transmission
Before diving into the solutions, it’s important to understand how sound travels. Sound is transmitted through vibrations in the air, which can pass through walls, ceilings, floors, and even small gaps in a room. There are two primary types of sound transmission:
- Airborne Sound: This includes sounds such as speech, music, or other noises that travel through the air.
- Structure-borne Sound: These are vibrations that travel through the building’s structure, such as footsteps, moving furniture, or machinery.
![]()
Effective soundproofing must address both types to ensure a quiet and confidential environment.
2. Preemptive Measures in Room Design
When designing a new room, you have the advantage of incorporating soundproofing solutions from the outset. Here are some strategies to consider:
2.1. Location and Layout
Choosing the right location for a meeting room or executive office can significantly impact its acoustic performance. Consider the following:
- Distance from Noise Sources: Place the room away from busy areas, such as cafeterias, restrooms, or corridors with heavy foot traffic.
- Room Shape: Avoid square rooms, as they tend to create standing waves that amplify sound. Instead, opt for irregular shapes or use sound-absorbing materials to mitigate this effect.
- Buffer Zones: Create buffer zones such as storage rooms or hallways around the space to act as barriers to noise.
2.2. Wall Construction
The walls are the first line of defence against sound transmission. To enhance their soundproofing capabilities:
- Double Stud Walls: Construct walls using double studs with an air gap in between. This design prevents sound vibrations from travelling directly through the wall.
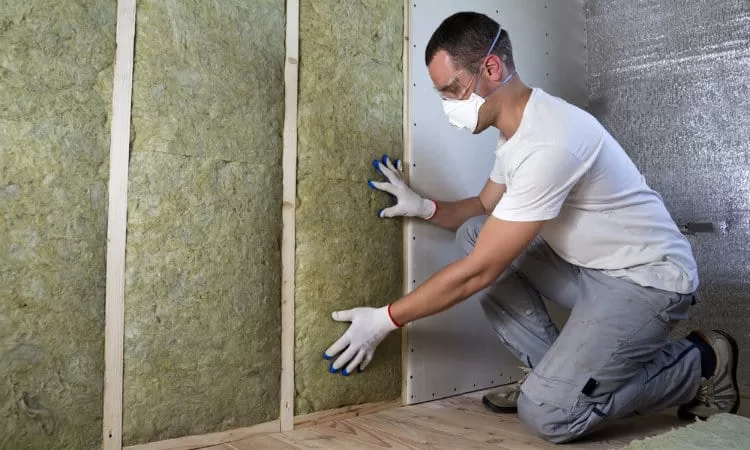
- Insulation: Fill the walls with high-density insulation, such as mineral wool or fibreglass, to absorb sound waves.
- Soundproof Drywall: Use soundproof drywall, which is denser and more effective at blocking sound than standard drywall. Consider adding an extra layer of drywall for additional soundproofing.
2.3. Doors and Windows
Doors and windows are common weak points in a room’s soundproofing. Address them as follows:
- Solid Core Doors: Install solid core doors instead of hollow ones, as they are more effective at blocking sound.
- Seals and Sweeps: Use acoustic seals around the door frame and install door sweeps to close gaps at the bottom. These measures prevent sound from leaking through small openings.
- Double-Glazed Windows: Install double-glazed windows, which consist of two layers of glass with an air gap in between, reducing noise transmission from outside.
- Acoustic Curtains: Consider adding heavy, acoustic curtains to further reduce sound transmission through windows.
2.4. Flooring
Flooring can be a significant source of noise, especially if the room is located above another occupied space:
- Carpeting: Use thick carpeting with a dense underlay to absorb sound and reduce footstep noise.
- Floating Floors: Consider installing a floating floor system, where the floor is isolated from the subfloor using resilient mounts, reducing structure-borne sound.
2.5. Ceiling Treatments
Ceilings are often overlooked in soundproofing, but they can be a major source of sound transmission:
- Acoustic Ceiling Tiles: Use acoustic ceiling tiles made from sound-absorbing materials to reduce noise reflection within the room.
- Dropped Ceilings: Install a dropped ceiling with soundproofing insulation above it to further reduce sound transmission from above.
- Sound Baffles: Hang sound baffles or acoustic panels from the ceiling to absorb sound and prevent echoes.

2.6. Voids Above Suspended Ceilings and Below Raised Access Floors
Voids above suspended ceilings and below raised access floors can act as conduits for sound to travel between rooms, compromising soundproofing efforts. To address these issues:
- Seal Perimeter Gaps: Ensure that the gaps between the suspended ceiling or raised floor and the walls are properly sealed with acoustic sealant. Even small openings can allow significant sound leakage.
- Acoustic Insulation: Add acoustic insulation within the ceiling void or below the raised floor. This helps to absorb sound and prevent it from travelling through these spaces.
- Barrier Systems: Consider installing barrier systems, such as soundproofing mats or panels, within the voids. These barriers block sound from moving between adjacent rooms through shared ceiling or floor voids.
3. Retroactive Measures for Existing Rooms
If you’re dealing with an existing room that has acoustic issues, there are several retroactive measures you can take to improve soundproofing without major renovations:
3.1. Wall Treatments
Enhancing the soundproofing of existing walls can be achieved with the following methods:
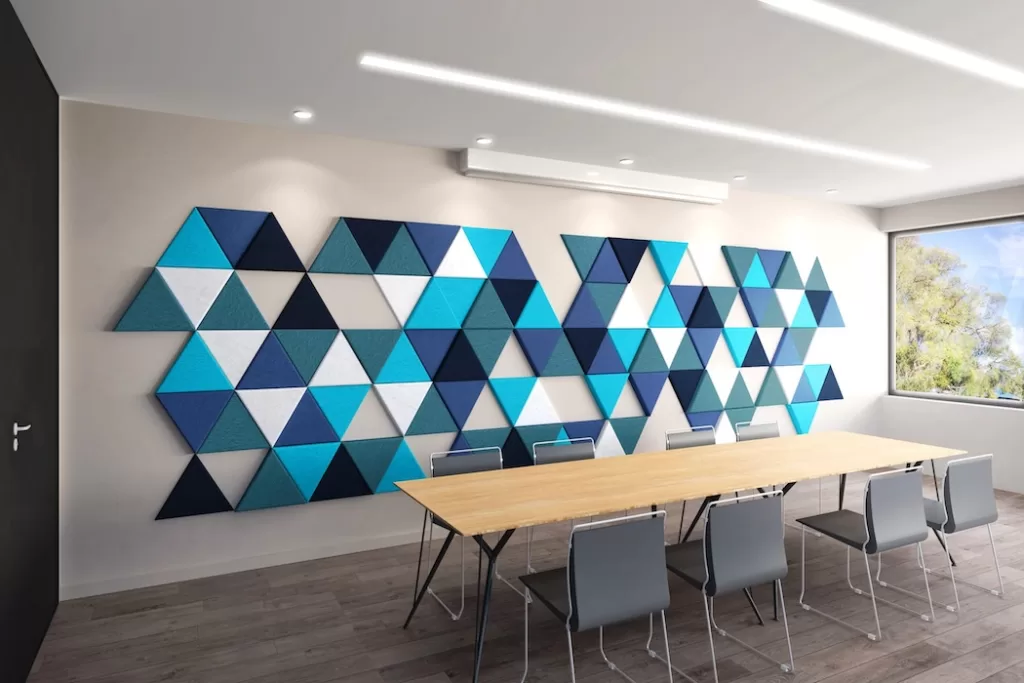
- Acoustic Panels: Install acoustic panels or foam on the walls to absorb sound. These come in various designs and can be customised to match the room’s decor.
- Mass-Loaded Vinyl (MLV): Attach mass-loaded vinyl to the walls to add mass and reduce sound transmission. MLV is a flexible, dense material that effectively blocks noise.
- Bookshelves and Cabinets: Adding bookshelves or cabinets filled with books or other dense materials along the walls can act as additional sound barriers.
3.2. Door and Window Upgrades
Improving the soundproofing of doors and windows in an existing room can make a significant difference:
- Weatherstripping: Apply weatherstripping around the door frame and windows to seal any gaps where sound might enter or escape.
- Door Seals: Replace old door seals with new, high-quality acoustic seals.
- Window Inserts: Install acoustic window inserts that fit inside the existing window frame, providing an extra layer of sound insulation.
3.3. Floor and Ceiling Enhancements
Addressing noise issues from the floor and ceiling can be done with the following solutions:
- Area Rugs and Mats: Place thick area rugs or mats on the floor to reduce noise transmission. Layering rugs can further enhance the effect.
- Acoustic Underlay: Add an acoustic underlay beneath existing flooring to improve sound absorption.
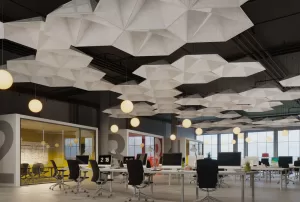
- Ceiling Clouds: Install ceiling clouds, which are large, suspended panels that absorb sound and reduce echo.
For ceiling and floor voids in existing rooms, you can:
- Retrofit Insulation: If access is possible, add insulation within ceiling voids or beneath raised floors to dampen sound transmission.
- Use Acoustic Plugs: Consider using acoustic plugs or barriers to seal off any gaps or openings within the ceiling or floor voids.
3.4. Furniture and Decor
Sometimes, simple changes to furniture and decor can have a noticeable impact on a room’s acoustics:
- Soft Furnishings: Add soft furnishings such as cushions, upholstered chairs, and heavy curtains to absorb sound and reduce reverberation.
- Room Dividers: Use soundproof room dividers or screens to create additional barriers within the room.
- Plants: Large plants or plant walls can help to break up sound waves and improve the acoustics of the room.
3.5. White Noise Machines
For environments where complete soundproofing is difficult to achieve, white noise machines can be an effective solution:
- Purpose: White noise machines mask unwanted sounds by producing a consistent, unobtrusive noise that blends into the background.
- Placement: Position white noise machines near doors, windows, or other areas where sound might leak in or out.

4. Testing and Maintaining Soundproofing
Once you’ve implemented soundproofing measures, it’s important to test their effectiveness and maintain them over time:
- Sound Testing: Use a sound meter to measure the noise levels inside and outside the room before and after soundproofing. This will help you assess the success of your efforts and identify any remaining weak points.
- Regular Maintenance: Inspect seals, insulation, and other soundproofing materials regularly to ensure they remain effective. Replace or repair any damaged components as needed.
5. Achieving Optimal Soundproofing
Soundproofing a meeting room or executive office is a priority for maintaining confidentiality, ensuring comfort, and minimising disruptions. Whether you’re designing a new space or addressing issues in an existing room, a combination of preemptive and retroactive measures can help you achieve the desired level of sound isolation.
By carefully considering the location, construction, and materials used in the room, and by addressing weak points such as doors, windows, and floors—including ceiling and floor voids—you can create a space that is both functional and acoustically sound. Additionally, retroactive solutions such as acoustic panels, weatherstripping, and white noise machines can further enhance a room’s soundproofing.